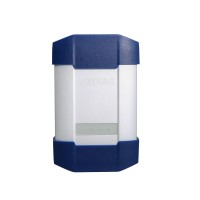
How to Use and Start VXDIAG VCX Plus with 2TB HDD?
Matched product:
VXDIAG Multi Diagnostic Tool For HONDA/GM/VW/FORD/MAZDA/TOYOTA/PIWIS/Subaru/VOLVO/ BMW/BENZ With Lenovo T420 2TB HDD
- Item No. VX17
- Free Shipping
VXDIAG MULTI Diagnostic tool package includes Second Hand Laptop Lenovo T420 and 2TB HDD, no need to install software, customers can use directly when receive.
1. Insert 2TB HDD into an empty laptop, and start the laptop.

2. Boot-up will bring you software brand list, please choose car software brand to enter system
Note: Each time you are allowed to choose one car brand software only.
3.1 Enter Mercedes Benz Window,
Xentry (2019.3)
EPC/WIS 2018.11
StarFinder 2018
DTS Monaco etc


3.2. Enter BMW Window, Desktop & Software Diplay (BMW 2019.3, ISTA-D 4.14.14 ISTA-P 3.65.2.000, Keep Updating)


3.3. Enter Ford Window, Desktop, Ford IDS V112, Keep Updating

3.4 Enter Mazda Window, Desktop, Mazda IDS V112, Keep Updating

3.5 Enter JLR window, desktop, JLR SDD V156 & Pathfinder Keep Updating


3.6 Enter GM window, Desktop, GDS2 2018, tech2win 16.02.24

3.7 Enter VW window, Desktop, ODIS 4.41, Keep Updating


3.8 Enter Volvo Window, Desktop, 2014D

3.9 Enter Honda Toyota Subaru Window, Desktop


Subaru SSM3 2018.4

